![]()
edited by John Hayes
|
The Cinema Construction Department |
|||||||||||||||||||||||||||
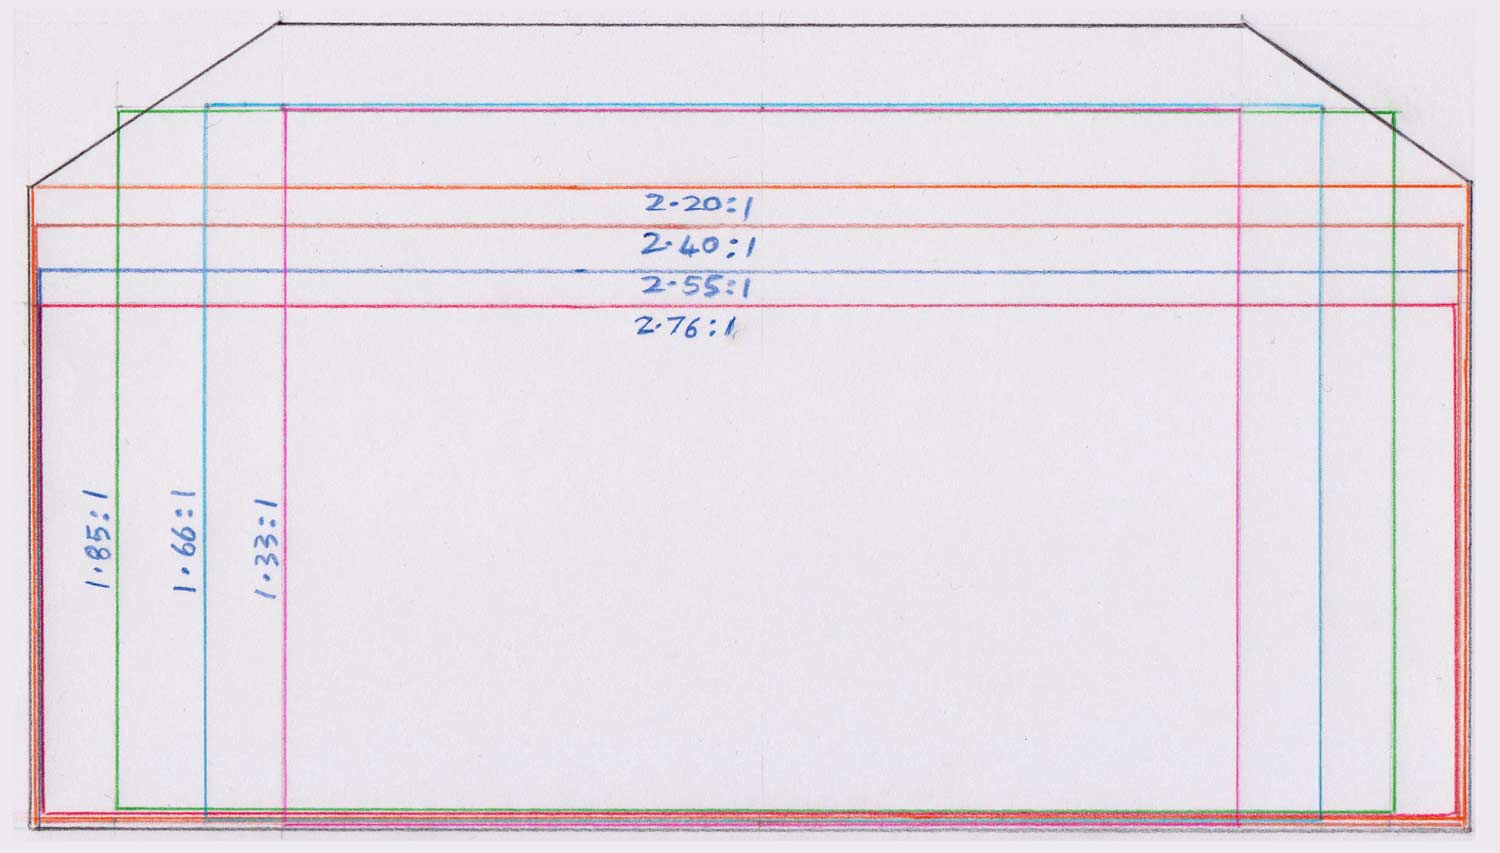
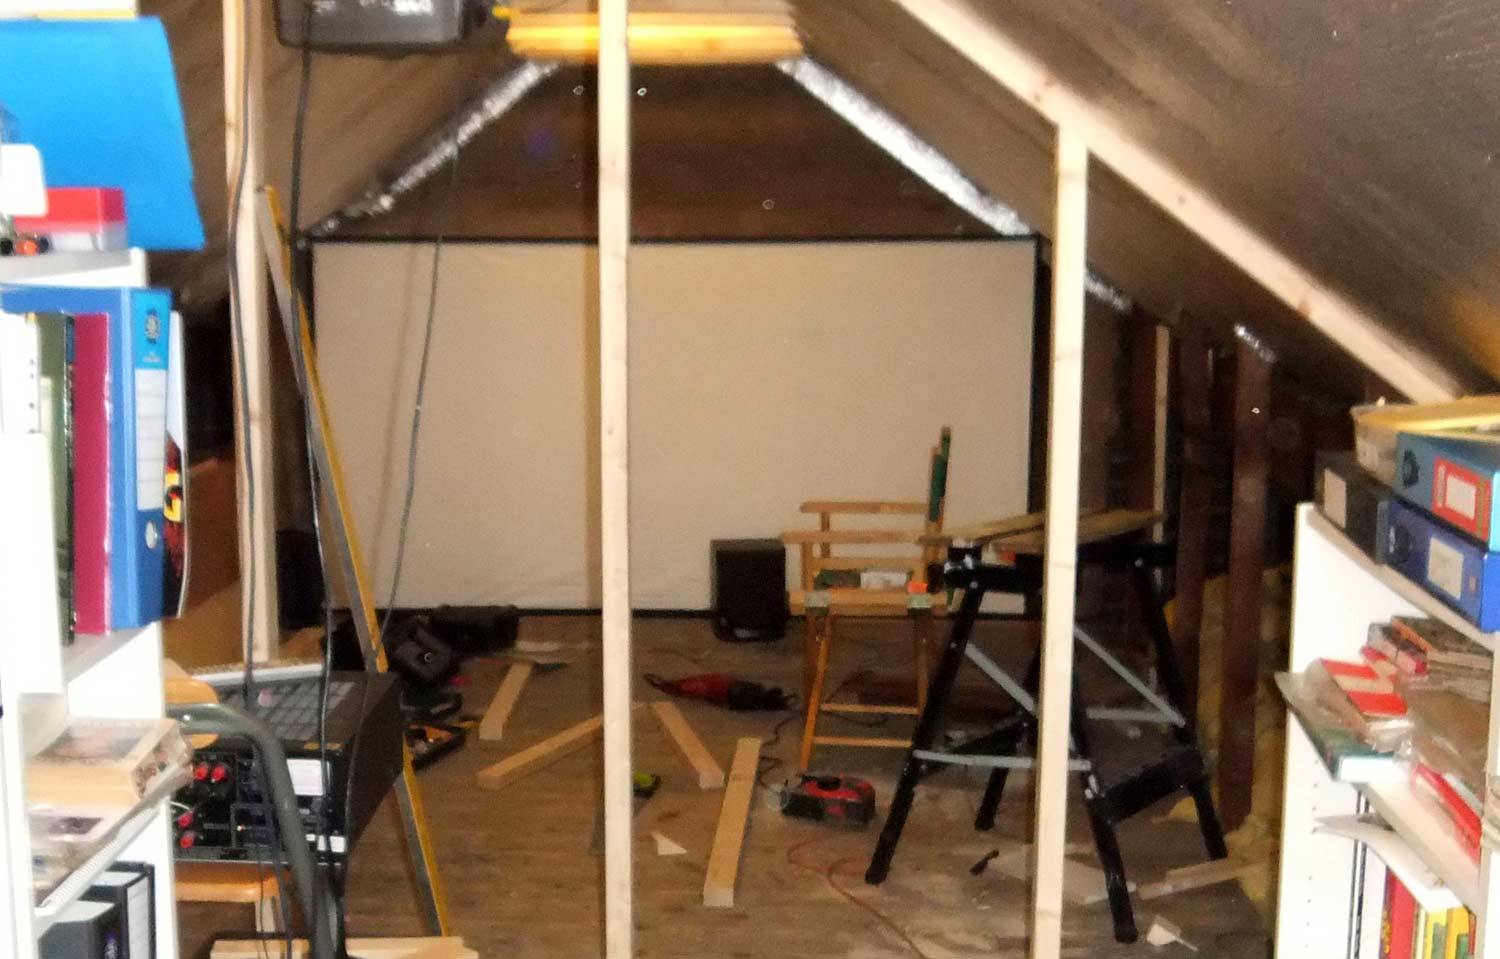
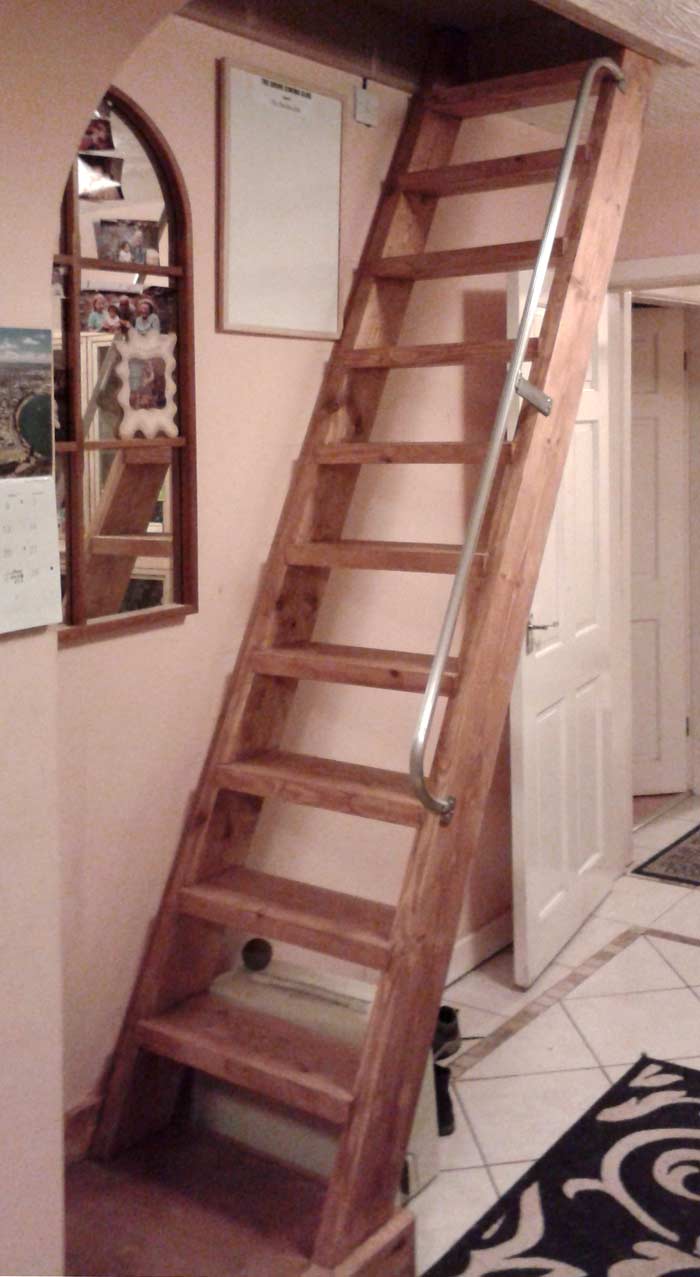
MY HOME CINEMA In March 2015, I finally took the plunge and decided to install a home cinema. Not just a room with a big TV and surround system – already got one of those. I mean a purpose-built room that looks and feels as close to a cinema as I can get – bearing in mind I don’t have an unlimited budget. In fact it’s very limited, so this project was going to take a while as I would be paying for stuff as and when I could afford it. I reckoned it would take me something like six to nine months to complete. Truth be told, I had actually started this project some weeks before I decided to write about it, so some work had been done and money spent – about £175 on materials so far and £470 on the Optoma HD141X projector plus £15 for a ceiling bracket. Here’s the blow-by-blow story of My Home Cinema... Building Commences When I mentioned earlier that it would be a purpose-built room, I meant exactly that. My Home Cinema would have to go in the loft – and ours is huge, for a bungalow; some 36 feet long and something like 9 feet of headroom right up into the apex of the roof. Fortunately, some previous owner of the property thought to floor the loft space in its entirety, so that’s something I didn’t need to think about. The far end of the loft has a window, so the cinema has been laid out at the near end, to achieve a total blackout, with a stud wall erected to divide it from the rest of the loft, which is still, in the great tradition of lofts, full of junk. The size of room I had to work with was determined by a number of factors – bearing in mind that this room was being created from scratch within a much larger space. The room could have been any length, really, but the length I decided on is approximately 14 feet. This length was controlled by the fact that I didn’t want the projector to be inside the room, but rather in a small projection box immediately behind it. With a throw of 14 feet, the Optoma projector will render an image approximately 9 feet wide at maximum enlargement. This brings us to another factor: aspect ratios.
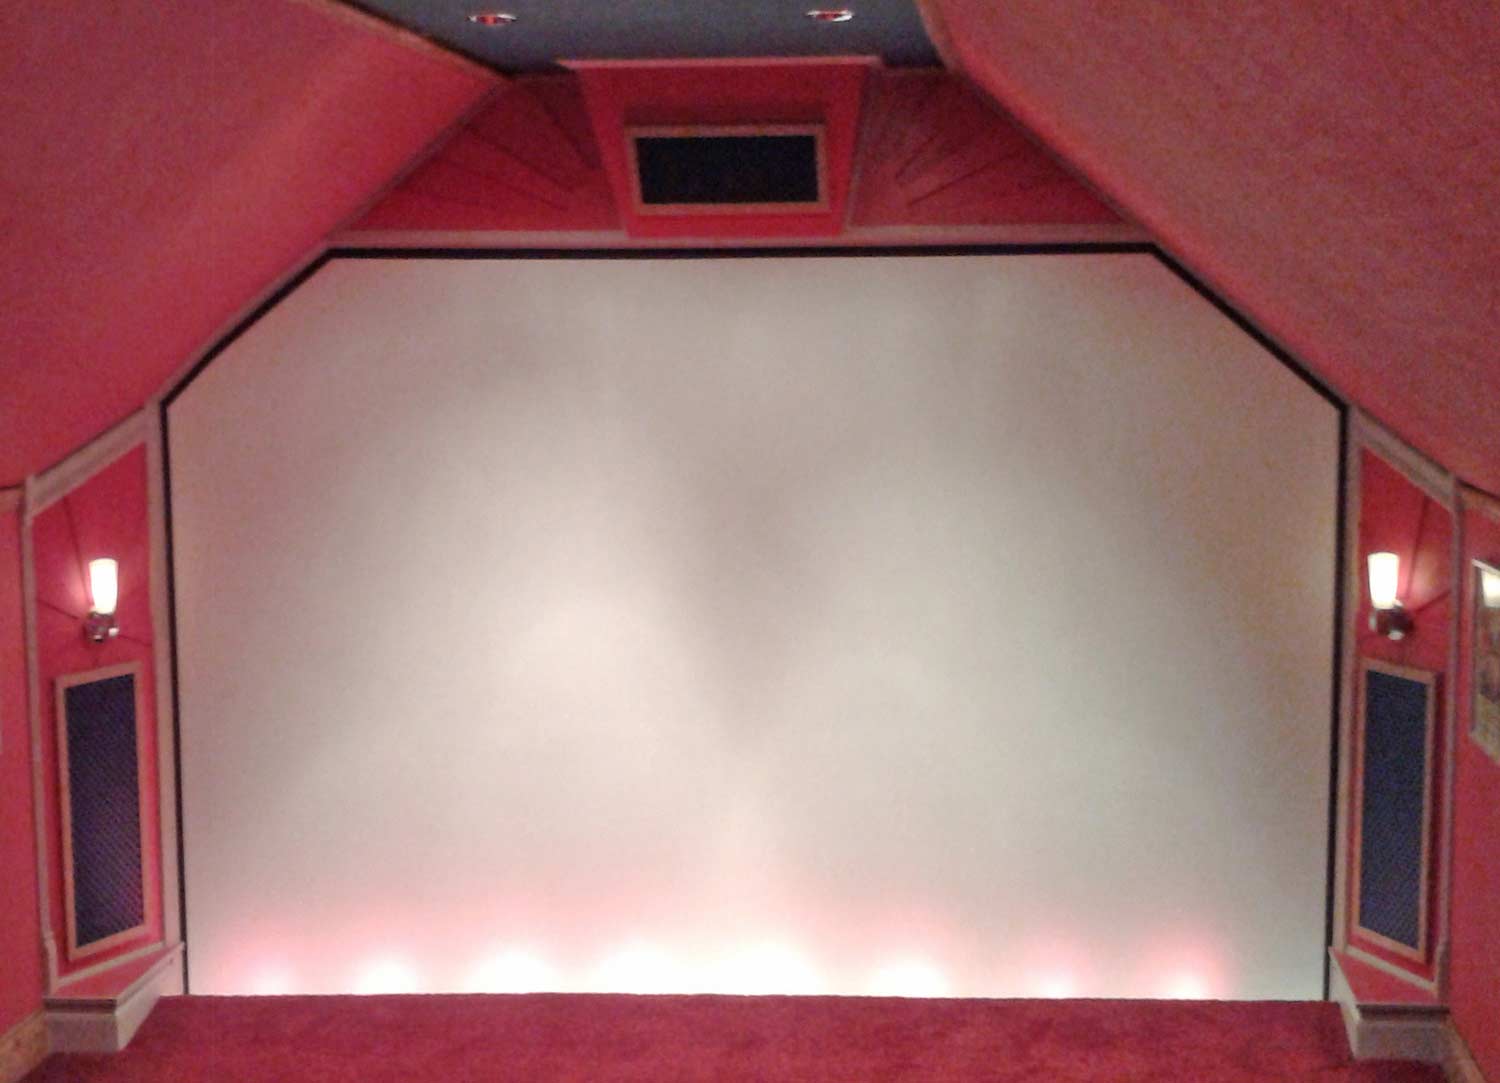
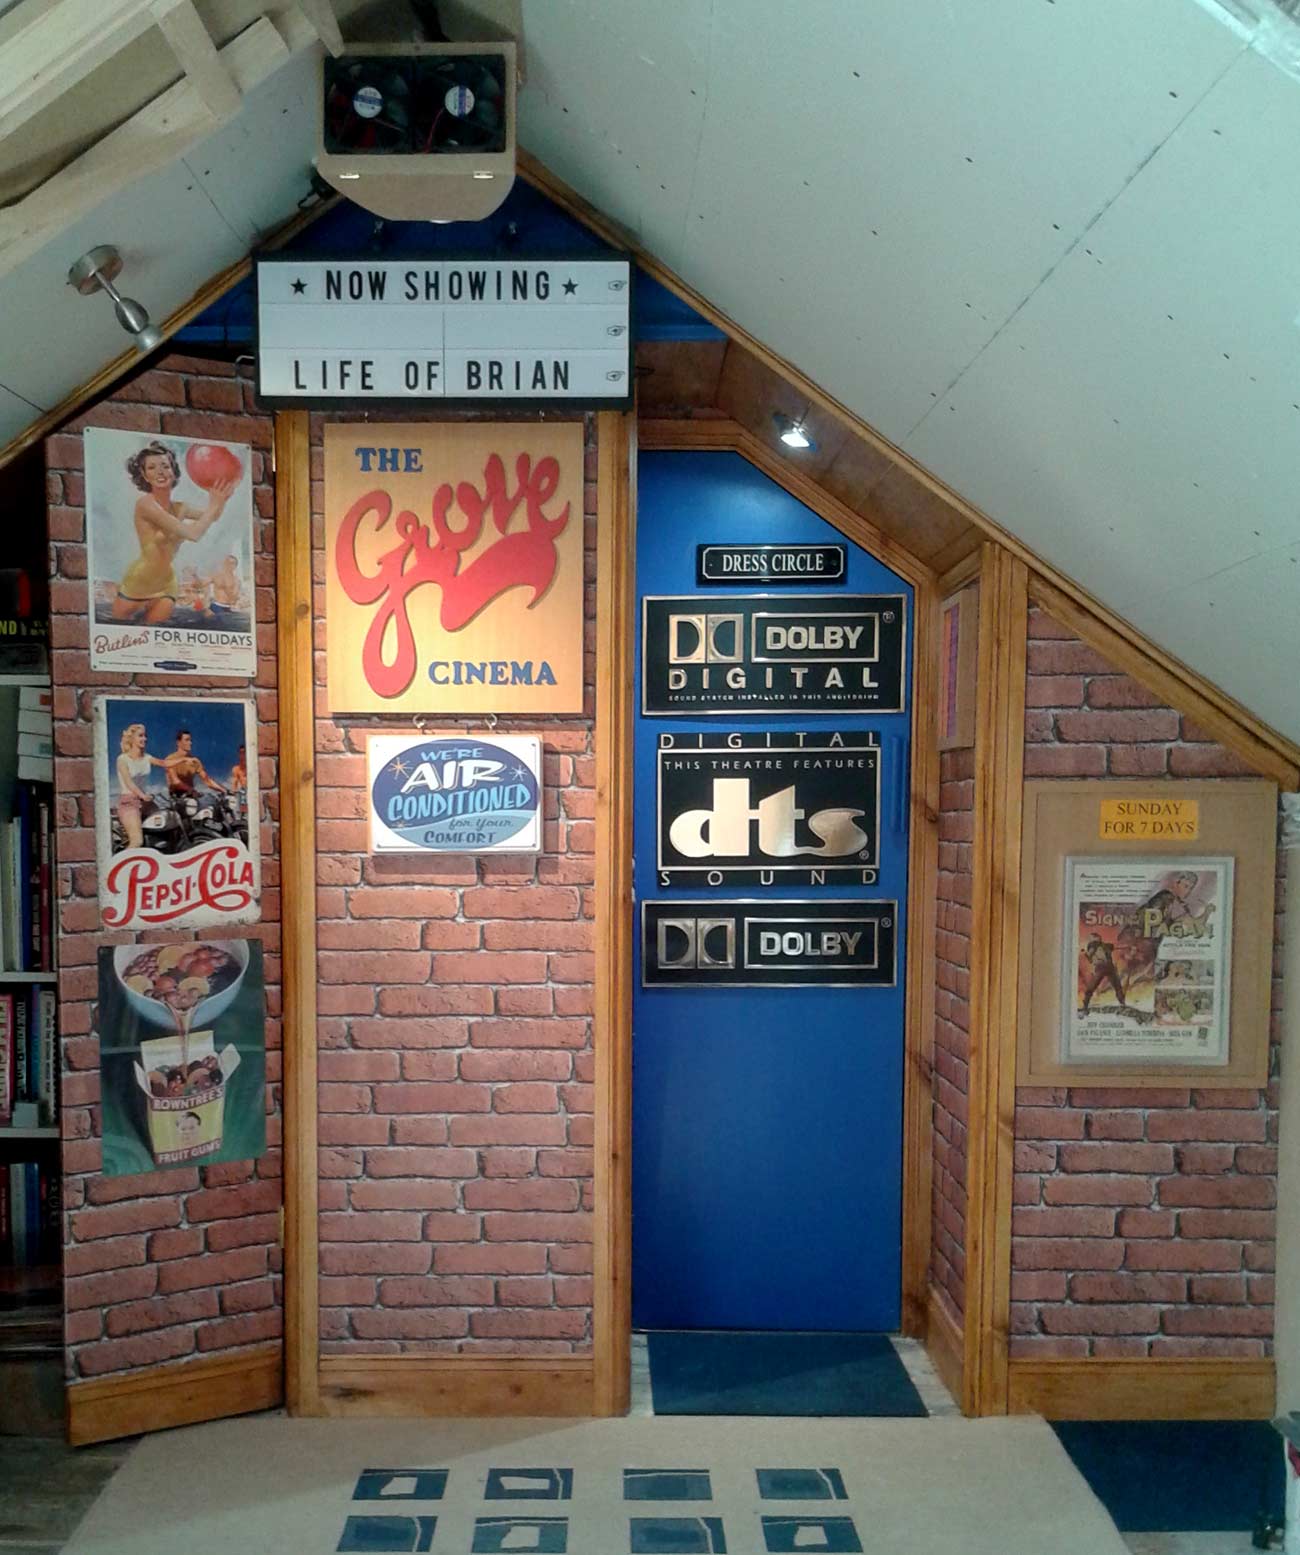
My main object was to get the maximum size picture from any of the currently available aspect ratios, which are generally 1.33:1, 1.85:1, 2.2:1, 2.4:1, 2.55:1 and 2.76:1. Now, to get the best of each aspect ratio – remembering that, as you can see from the picture, I am creating this cinema in a roof space that will have sloping ceilings on each side – I need the strange looking screen shape you see there. The wider aspect ratios are no problem at all with this arrangement, and nor is the 1.33:1 ratio; all can fit comfortably within the screen area. The only compromise I had to make is that I lose a tiny bit off the top corners of a 1.85:1 screen shape with the projector on minimum screen size, as I only have a maximum of 4 feet vertical height before I hit the sloping roof. After playing around with throw distance and projection angles etc., I realised that I would just have to live with this if I want to maximise my screen size with the wider ratios – which, in the end, are the ones I prefer anyway. And while we’re on the subject of the screen, I had to factor in the cost of a plasterer to achieve the nice smooth, flat finish I needed. I framed and boarded the screen myself, but I had to bring in Phil the plasterer to skim it for me. So add another £80 to the budget for Phil, £5 for a bag of plaster – and of course £10 for the matt white emulsion paint.
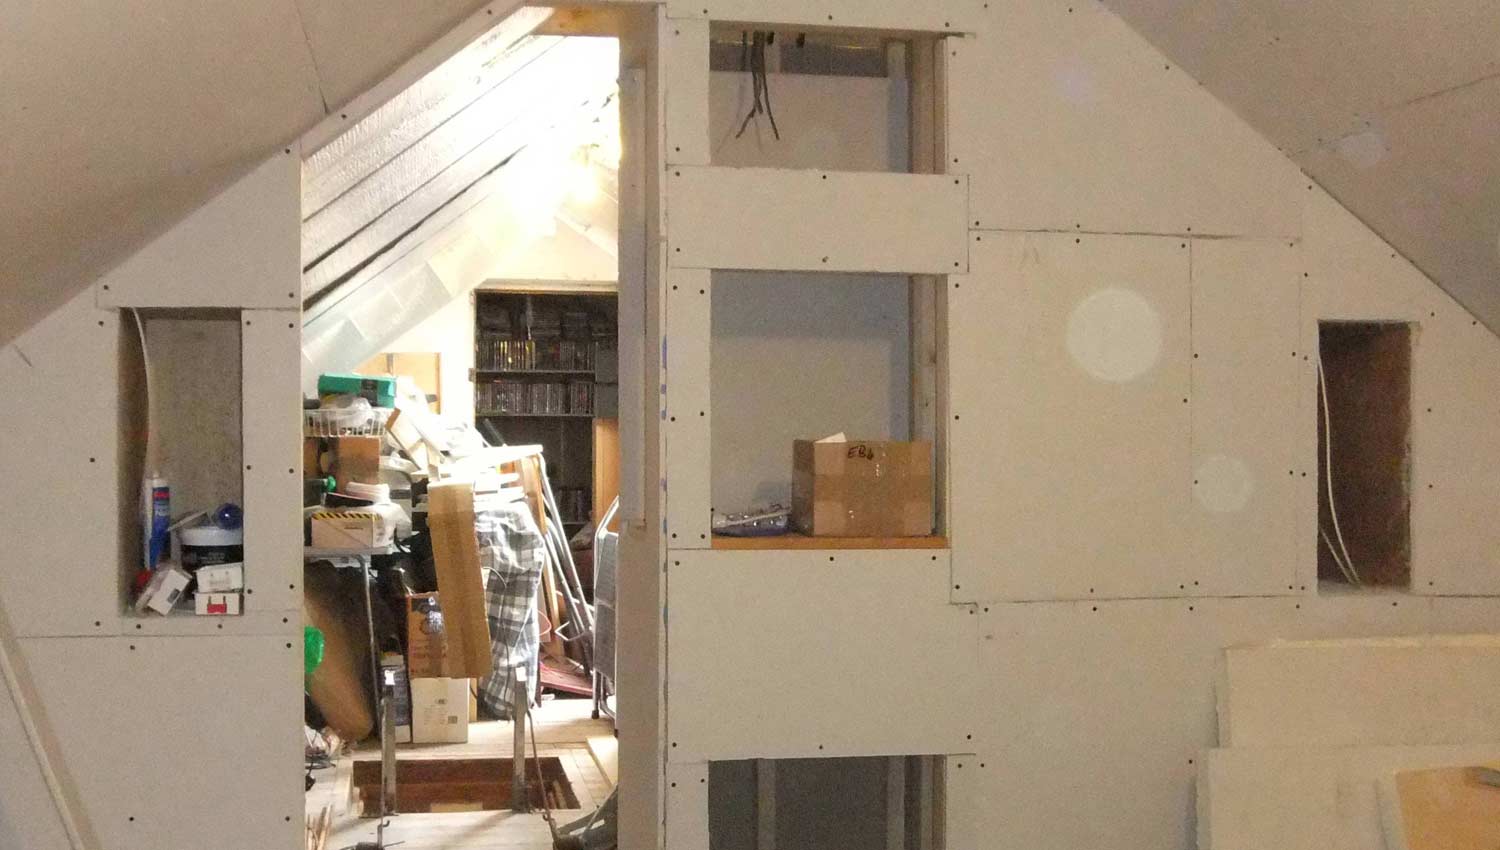
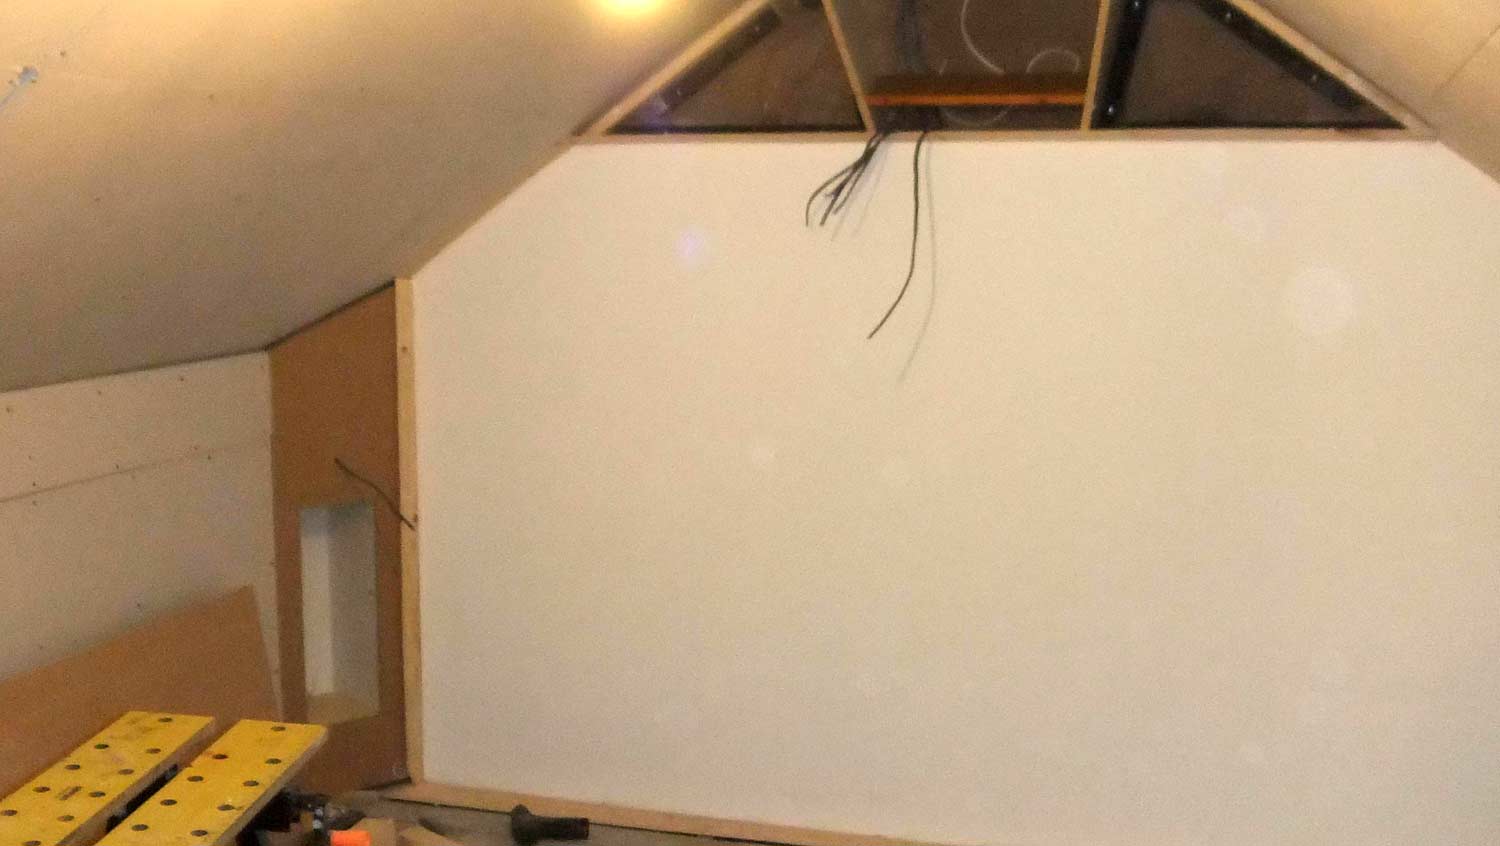
As you can see from the pictures, at this stage framing and boarding out was more or less completed and most of the wiring installed. Material cost up to this point stood at around £300 (including another £20 I spent on timber and the last of the plasterboard), give or take a tenner. I also installed an Ethernet cable which runs down to the router in living room – a 15 metre length was £3.50 from Amazon UK, post free. This reaches to the Blu-ray player and has one of those plug-in, multi-port thingies on the end so I can send a further cable (10 metres – £2.50 from Amazon, again) to the main bedroom player. Might as well have both of them able to access the internet when they want a firmware update (and indeed, the bedroom player updated itself as soon as I turned it on, after connecting all the Ethernet cables. Amazing). This took the plasterboarding as far as need to for the time being, and I then concentrated on the proscenium around the screen. Why a proscenium at all, you may ask? Well, the reason is, quite simply that this project was never just about making a place to project movies. As I stated at the outset, my aim was to create something akin to a real cinema experience – that is to say a cinema from the days before the multiplex. And that means it has to have a proscenium like they did in the good old days.
There were many different types of décor for auditoria back then, but my favourite was always the art deco look, so that’s what I aimed for. The challenge was to create an art deco look in what is most definitely not an art deco space, and you can see some of the results in the photos included in the text here. There’s also a link at the end of this page to a gallery of 3D photos of the construction. After several more weeks of work, quite a few items were added: the proscenium was installed with cavities on either side for the front L/R speakers. I installed an angled box above the screen for the centre speaker, as there was no room below because the screen reaches down to the floor. The speaker is angled so that the sound is directed to the seating positions. I also added a slight slope to the floor immediately in front of the screen to hide the footlights I wanted to install. At the points where the sloping walls meet the ceiling and vertical walls, I concealed the join (or lack of it!) with lengths of picture rail, which handily had just the right profile to fit comfortably into the angles. This cost me around £15 for a pack of six lengths, which was just enough to do the job. The Proscenium The proscenium encompasses the whole screen surround, speaker pods included and was pretty much made up as I went along. I tried to draw up some sort of plan, but couldn’t come up with anything that was practical, so I binned the rough sketches and just got stuck in. I started with some plain architrave around the screen and then added bits on here and there – this meant several trips to the moulding rack at the DIY store to find something suitable; and this sometimes meant using a couple of mouldings fixed together to give an effect I liked. Making it up as you go along is not without its problems, of course – you’re in trial and error territory, after all. But if you just think about what effect you’re trying to get, sometimes you’ll even surprise yourself with what works! On the downside, because mouldings are a bit of specialist thing, they tend to be less cost-effective than standard architrave and skirting board patterns, because they have smaller cross-sections and tend to come in shorter lengths – and are more expensive; sometimes more than five or six quid a length, although most are around the £3 mark . I probably finished up spending around £35 on mouldings – including some narrow strips, which I painted matt black, to create a sharp edge all around the screen.
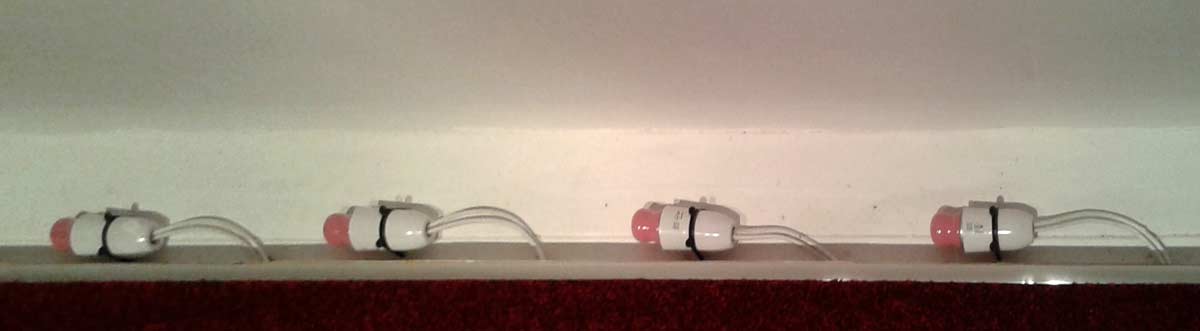
The centre speaker pod, over the screen, also houses a couple of electrical joint boxes which enable the side lights and footlights to be switched from a position at the rear of the theatre. I’m fortunate in being an electrician by trade, so I did this myself, which saved a bit of money. It’s not a big job, so it shouldn’t cost too much if you have to get someone in to sort that out for you. The footlights are ordinary plastic lampholders held down with a couple of woodscrews. The lamps are 15 watt pygmy bulbs – not generally available in shops these days, but are still obtainable online. I used red bulbs because they give the most dramatic effect (blue and green was a bit insipid). The footlight well was created by making a small ‘ramp’ in the floor at the foot of the screen. This is only a couple of inches deep, but is sufficient to hide the lampholders from the audience, which can be seen in the picture. It let me take the screen right down to floor level, too, which can be quite effective with some films.
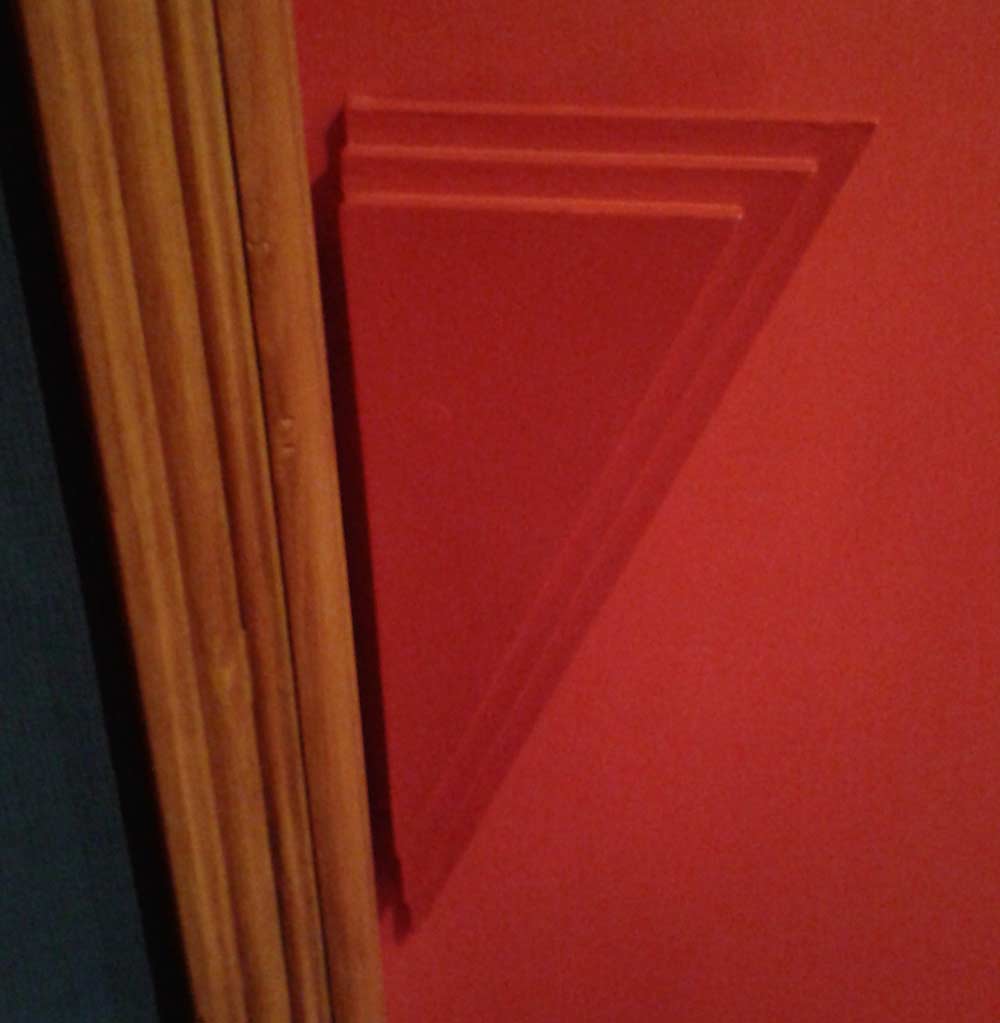
I mentioned earlier that I wanted to try for a kind of art deco feel about the place, so after a quick search online, I decided to try and incorporate the ‘rising sun’ motif that was quite common during that period – especially on radio cabinets. This was made with 10mm MDF as a base, with the ‘rays’ and ‘sun’ made of 5mm MDF pinned and glued on. The two 8'x 4' sheets 10 and 5mm of MDF I bought (and had cut in half lengthways so it would fit in the car) cost about £30 for the pair, but from these two sheets I was able to cut all the speaker pod fronts, all the rising sun effects, a concealed removable door I needed to make to give access to some pipes and electrical joint boxes and also the actual door into the auditorium. So it turned out to be quite economical, really. 5Mm MDF was also used to make the art deco style door handle – it’s just three triangular pieces glued together which were then pinned and glued to a waste piece of angled moulding, which was then glued and screwed to the door (people have asked me where they can buy handles like this!).
The actual speaker port covers were something I agonized over for weeks: what they would look like, what could I make them out of, how could I make them removable (to get the speakers out). I would need five of them for the speaker pods; all rectangular, of course, but with three different sizes required for the front pair, rear pair and centre single. I thought a metal mesh would look good – in silver finish, I decided – but to get the five required shapes meant buying several sheets of mesh, with considerable expense – and waste – involved, so I eventually settled on perforated MDF. One sheet large enough to get my five pieces out (2'x 6') came to over £20, but was much less than the metal mesh would have cost. The downside was that it would need to be painted – but I’d be buying paint anyway, so it would just be a bit more painting to do when the time came. The MDF would need to be in a frame, too – I thought oak finish would match the IKEA chairs I’d bought (£55 each) – but didn’t fancy A) paying for real oak framing material and B) cutting the twenty mitres required – whether freehand or with a mitre block.
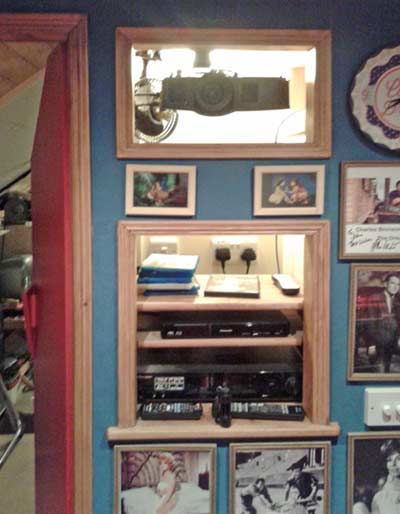
Then I had a brainwave: I cut the speaker ports out of the MDF, painted them (a primer/undercoat and then about four coats of satin finish spray paint, which cost £9), then took them to a picture framers – he charged me £50 for framing all of them in plastic, oak-finished frames, and they look great! I wanted art deco-looking light fittings either side of the screen – in chrome to match the chrome downlights I planned to put in the ceiling – but they proved quite difficult to find. I looked at several up-lighter types of fitting, which would have been fine, I guess, but for the fact that they would only be about three feet from the floor and you would be able to see the lamp and its holder inside, which I didn’t like. Then I came upon the ones you see in the picture, which are actually for a bathroom – hence the enclosed light bulb. Just right for the job, and when I determined their exact position, I made another ‘sun ray’ effect around them with the MDF. The Projection Box Just like a real cinema, the projection box is outside the auditorium – although the projector unit controls and Blu-ray and amplifier controls can be accessed easily from inside. Outside the auditorium, there is a separate access door to the box – which is actually on magnetic catches and just lifts out completely. Now, this is where you can learn from my mistake: The whole time I was building the projection box, I had the access door on the side. There was no logical reason for this except that’s where I pictured it in my mind’s eye more or less right from the start. When I came to connect all the playing equipment, It was quite awkward getting my sausage fingers around the various speaker connections and HDMI sockets – as you can probably tell from the picture. If I was doing it again, I’d have put the power sockets on the side and the access door at the rear – pretty obvious now, I guess, but that’s what happens when you don’t think something through!
The subwoofer sits underneath the projection box in pod of its own – on top of a cut down paving slab that has a piece of carpet square above and below to deaden any unwanted vibration. With the theatre being in the loft, the floor is obviously made of wood, so I have a very pleasing bass ‘rumble’ when the sound system is running. The slight downside of that, though, is that sound from the cinema can be heard in the room below. In our case, if we’re watching a film in the cinema together, there’s no one else in the house so that’s not a problem, and as my wife is a little hard of hearing, when she’s in the living room below, she isn’t really aware of the sound from the cinema above anyway. However, extra soundproofing on the floor might be something to consider if you have other family members with rather more acute hearing!
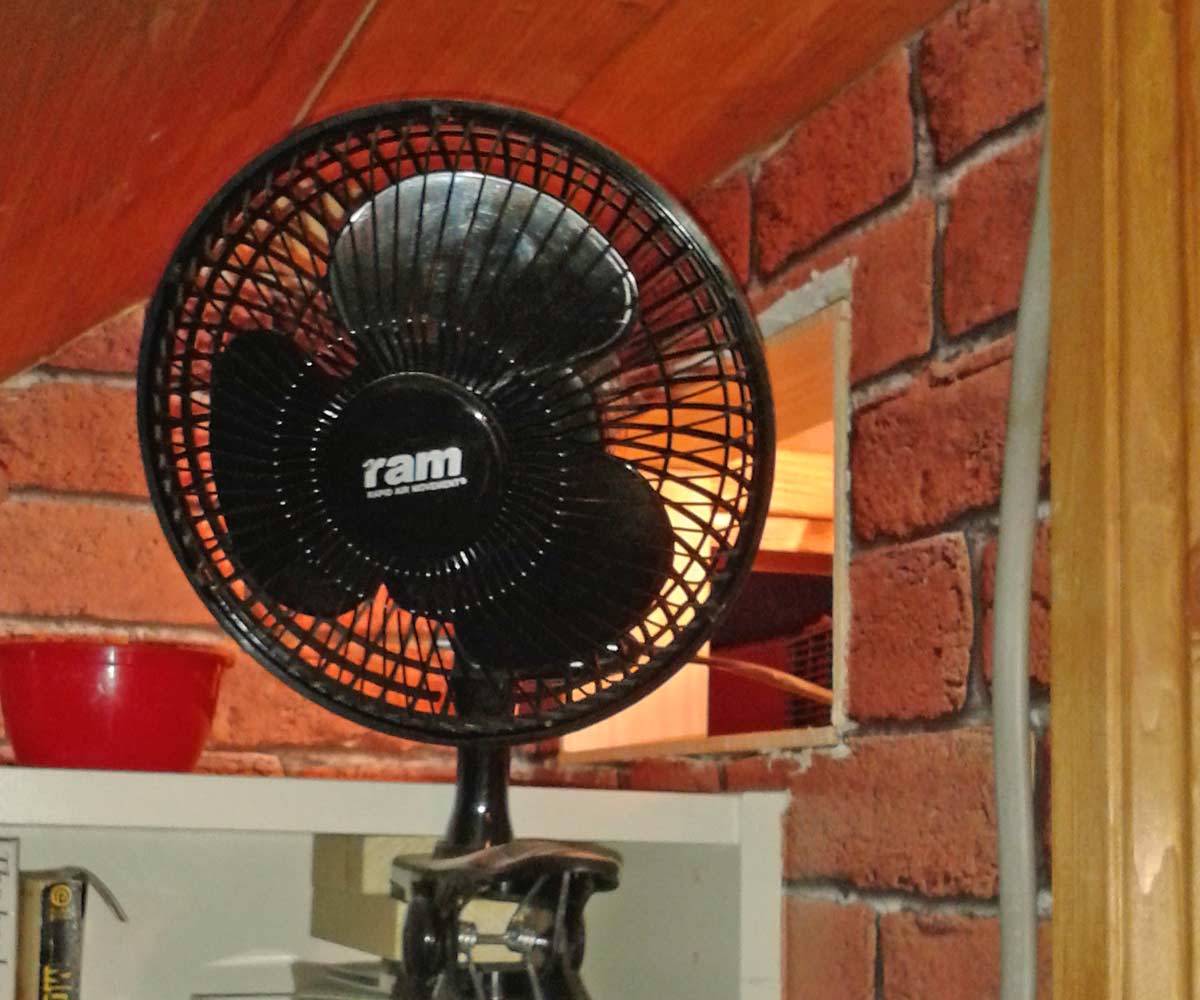
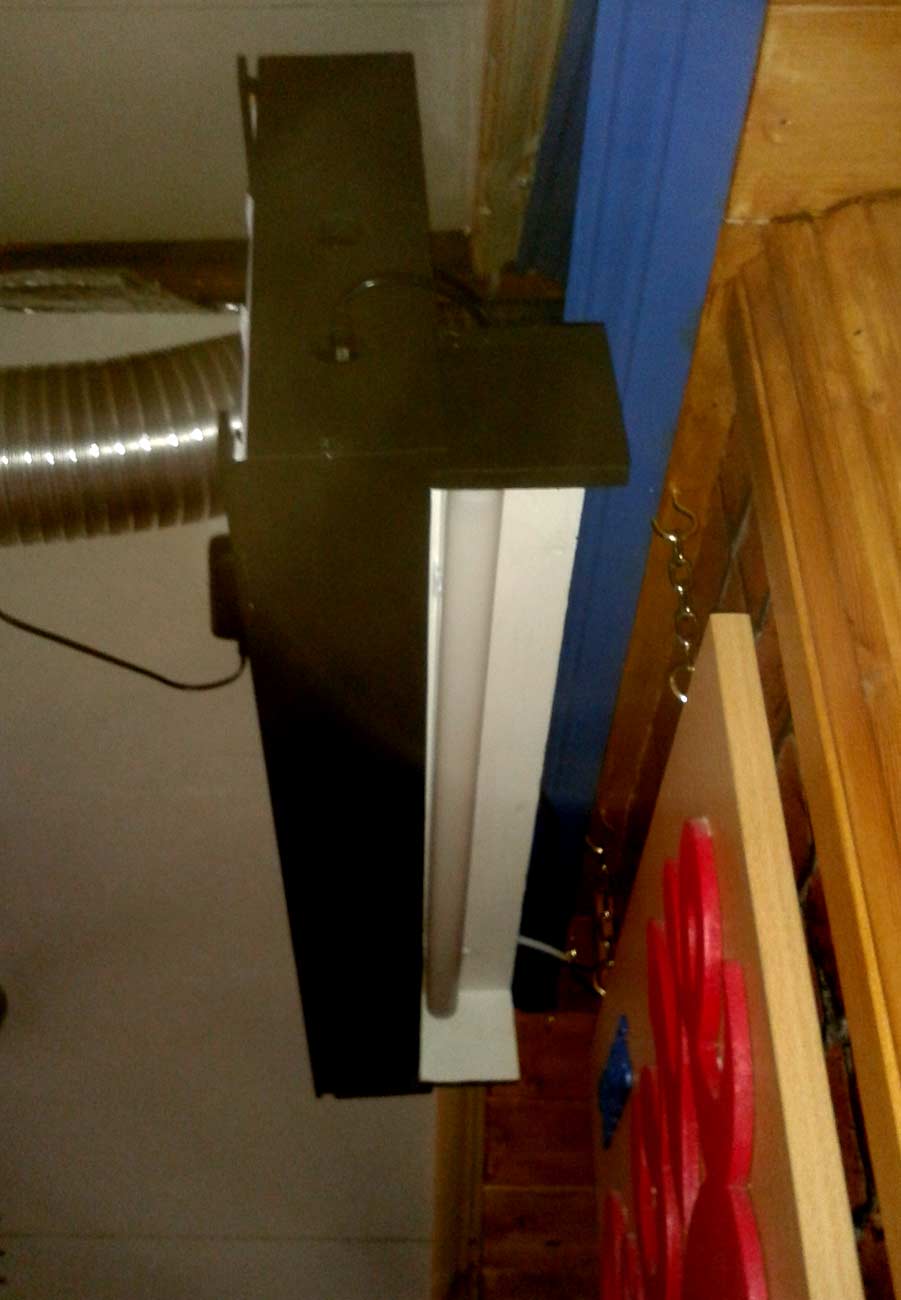
One unexpected thing I found was how warm it got inside the box, even though it is open on two sides (I generally leave the access door off during shows). I’d assumed that I’d allowed sufficient ventilation, but apparently not! During one show, the projector shut itself down (this Optoma 141X HD has been particularly troublesome, but that’s another story, which I may detail at a later date) and would only restart after a few minutes. It had become quite warm inside the box, even with my so-called ventilation, so I later installed an extractor fan – the in-line type that you might have above a shower unit, where the fan motor is positioned in a flexible tube some feet away from the inlet grill. That seemed to work for a couple of showings, but the apparent overheating problem returned, necessitating drastic action. The in-line fan and tubing were removed and an additional opening was cut into the projection box, opposite the projector fan outlet. I then bought two – I did say drastic action was called for – clip-on six-inch fans (£12 each) and positioned one inside the box, blowing air on to the projector, and the second outside the newly cut opening, facing away from the box so as to pull air away from the projector. Happily, after some dozen or so showings since the modification, no further problems have occurred and the projector has been performing correctly. At last. In Conclusion It is now some ten months since the Home Cinema Project was finished. It took me the best part of a year to complete, working on it in one or two hour bursts, sometimes not doing anything for days. Most of the time and material cost was taken up by having to build a complete auditorium – walls, ceiling, etc. – in an empty loft space. If you have a spare bedroom you can convert, you’ll save a lot of time and effort (and money). As to the cost, I stopped keeping track after about three months, but I doubt if I spent more than £400 on building materials (and some tools) – spread over several months, of course. Decorating and furnishing: well, I looked for end of line bargains for paint and wallpaper – probably around £60 spent there. I got lucky with the carpet as we’d just had a new fitted carpet in the lounge and the guy remembered me when I went back and bought more of the same deep red pattern for the cinema, so he gave me very good deal on that – £175 fitted with underlay.
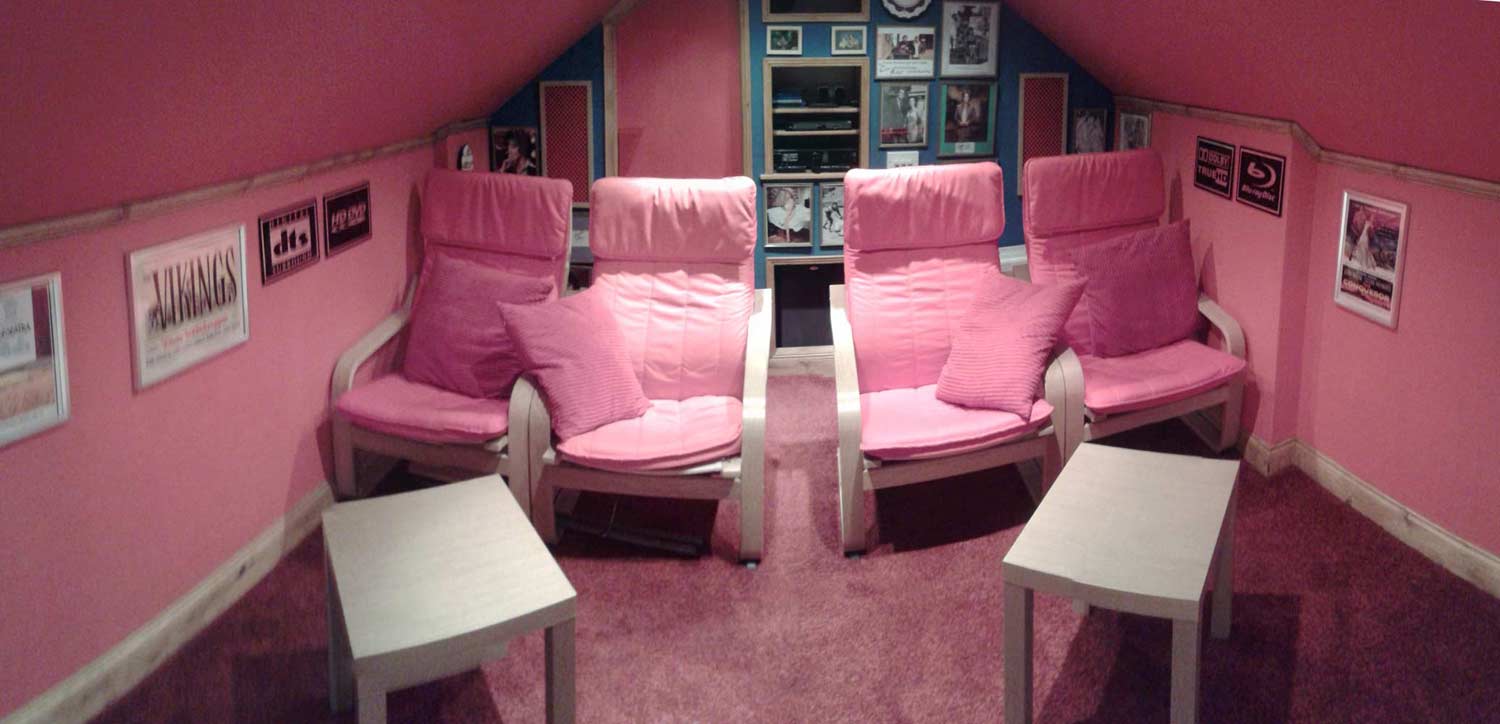
For seating, as previously mentioned, I had decided to use the same type of IKEA chairs that we have in the back lounge. These are the type they call POANG and are about £55 each, complete and I would be needing four. They are very comfortable, light and easy to assemble. You can spend more if you don’t like the basic cushions – red, black or white – but the red suited the planned décor so that was fine for me. I bought four additional square corduroy cushions from ASDA in their sale – £5 each and two small coffee tables from ARGOS – £9 each, and that completed the decorating and furnishings.
As for equipment, there’s really no limit to what you can spend. They say get the best you can afford, and I suppose that’s true – but you can still look for a bargain. My amplifier – a Pioneer – was £150 because it was the previous year’s model (2014), and it does its job well. The aformentioned Optoma projector was troublesome at first – remote wouldn’t work; unit controls wouldn’t function; wouldn’t shut down correctly; wouldn’t turn on sometimes – you name it, it wouldn’t do it. It went back to Optoma twice, but they could find nothing wrong with it, only for the gremlin inside to resume its work when the machine was re-installed in my cinema. Very, very frustrating, until I installed the fans as detailed above and, fingers crossed, no more trouble since. I put the problems down to overheating, so that might be something to bear in mind if you purchase that machine and install it in a similar situation.
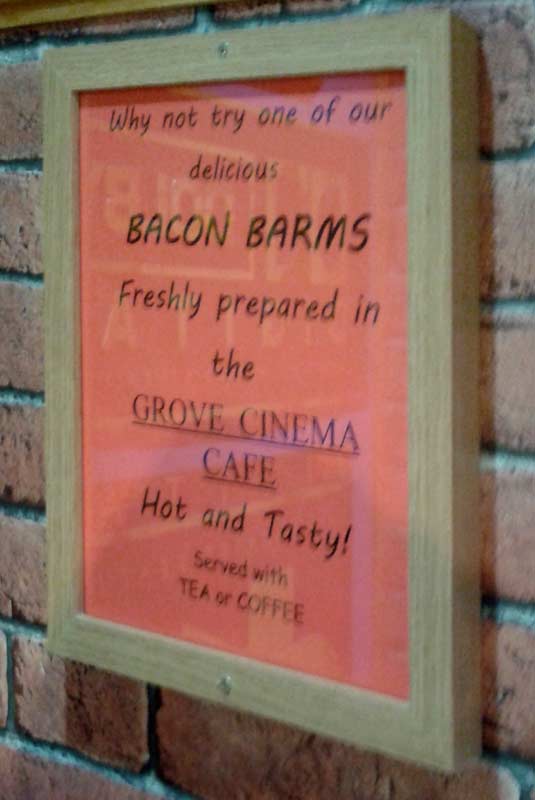
The player is a Panasonic 4K upscaling 3D model – cost around £70. I’m taking it in shortly to be converted to multi region for both DVD and Blu-ray – that will cost £100, but that’s my choice, of course. The speakers are kind of old, now. They were bought for my very first surround system at our old place, in 2002, but they still work and sound fine to my 68-year-old ears, so I didn’t bother to buy new ones. And that is pretty much that. After about a year’s not too strenuous work – and not a terrifically huge amount of cash – I have a cinema of my very own. It’s fairly compact, I guess, compared to others I’ve seen, at fourteen feet long, ten and a half feet wide, with just under six and a half feet headroom, but it’s...cosy. The screen is nine feet wide with four foot high vertical sides, which accommodates a Todd-AO shaped image perfectly, while the centre section is five feet high and six feet wide – just right for academy ratio images. I would definitely recommend taking the screen down to the floor (provided you only have a single row of seats) as this greatly increases the sense of involvement in the action of the film you are showing. Particularly effective, I discovered as an unexpected bonus, are the Flicker Alley Blu-ray Cinerama restorations, which have the Smilebox Cinerama simulation of a deeply curved screen. Anyone who has seen an actual Cinerama presentation will be pleasantly surprised to find themselves holding on to the arms of their seat as the Cinerama camera hurtles down winding roads, foaming rapids or mountain valleys. Quite breathtaking – and all on a nine foot wide screen! It’s been up and running for the best part of a year, now, and it still feels great to just go up there, turn on the lights, sit back in a comfy seat and imagine I’m sitting in the circle of one of the long-gone cinemas of my youth. I run a monthly film club for a few friends, with bacon sandwiches, tea or coffee available at the kiosk – a blast from the past for two or three hours that we wouldn’t miss for anything. Building this home cinema was one of my better ideas, so, if you’re thinking of having a go at one yourself, stop thinking about it and get on with it! You will absolutely not regret it.
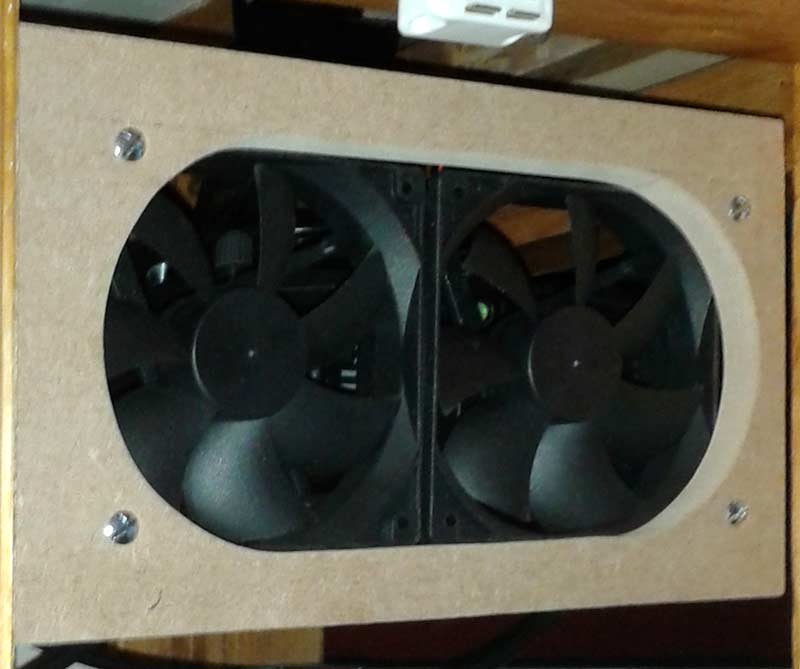
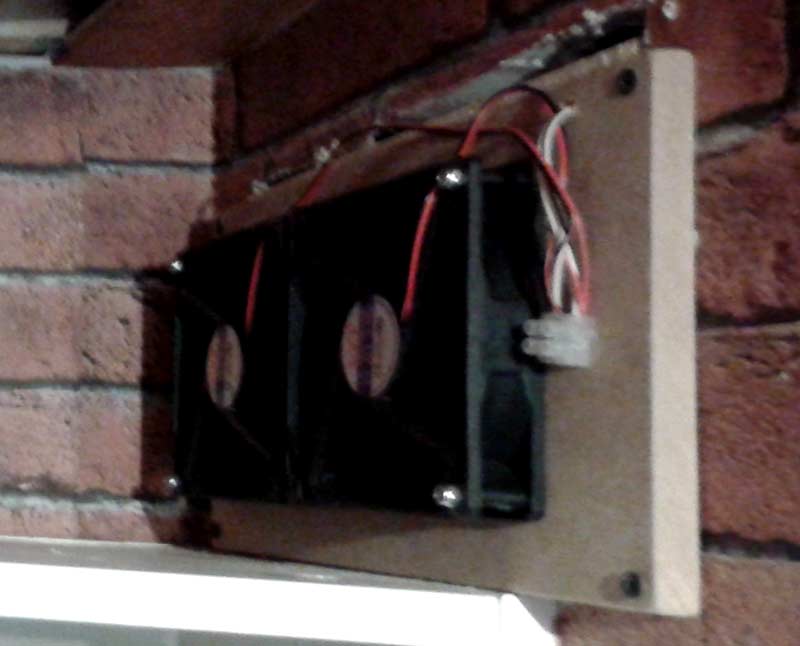
Postscript to Home Cinema. I thought I’d add an update to the cooling fan topic mentioned above, regarding the six-inch clip-on fans I was using to cool and ventilate the projection box. While they did the job remarkably well, I gradually became aware of a couple of other issues they created. The first was noise. While not excessively noisy individually, two of them going at the same time began to intrude – to my ears – into the cinema itself. No one else ever mentioned the sound of the fans (probably too polite), but I was aware of them all the time, so something had to be done. I remembered that many years ago I’d built a stereo slide projector and to cool it I’d used computer cabinet fans, which had worked very well. Searching around on eBay, I found a seller advertising 120mm brushless 12 volt DC fans for a fiver each, so I bought half a dozen. I made two frames from MDF so I could mount the fans in pairs, side by side; one pair in a fixed frame extracting air from the projection box, and the other pair in a hinged frame – so I could swing it out of the way of the projector’s mains and HDMI sockets – blowing cool air into the box. The fans run at 0.25 amps each, so I acquired (also from eBay) a 2A DC power supply – around four quid including delivery – that would easily drive four fans, and simply connected them all together, plugged the power supply into one of the projection box sockets and switched ’em on. They were very quiet indeed – actually the projector fan itself was noisier – and they do the job just as well as the two desk fans.
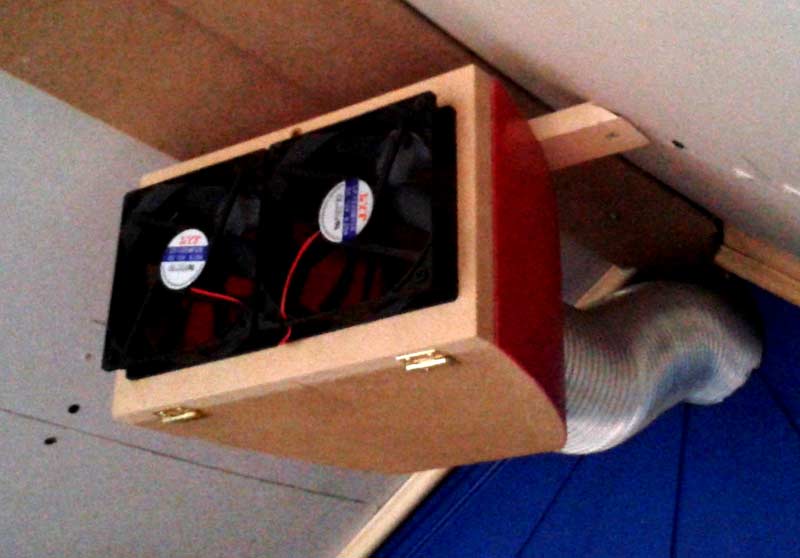
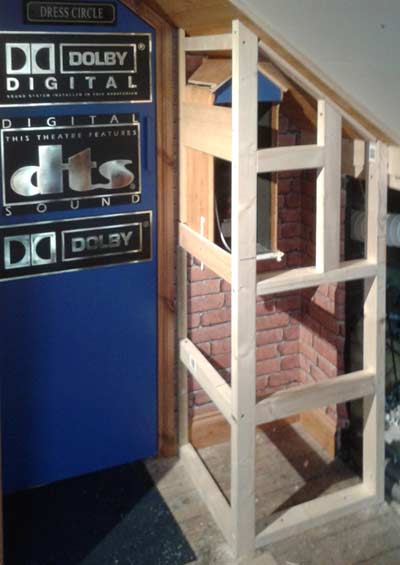
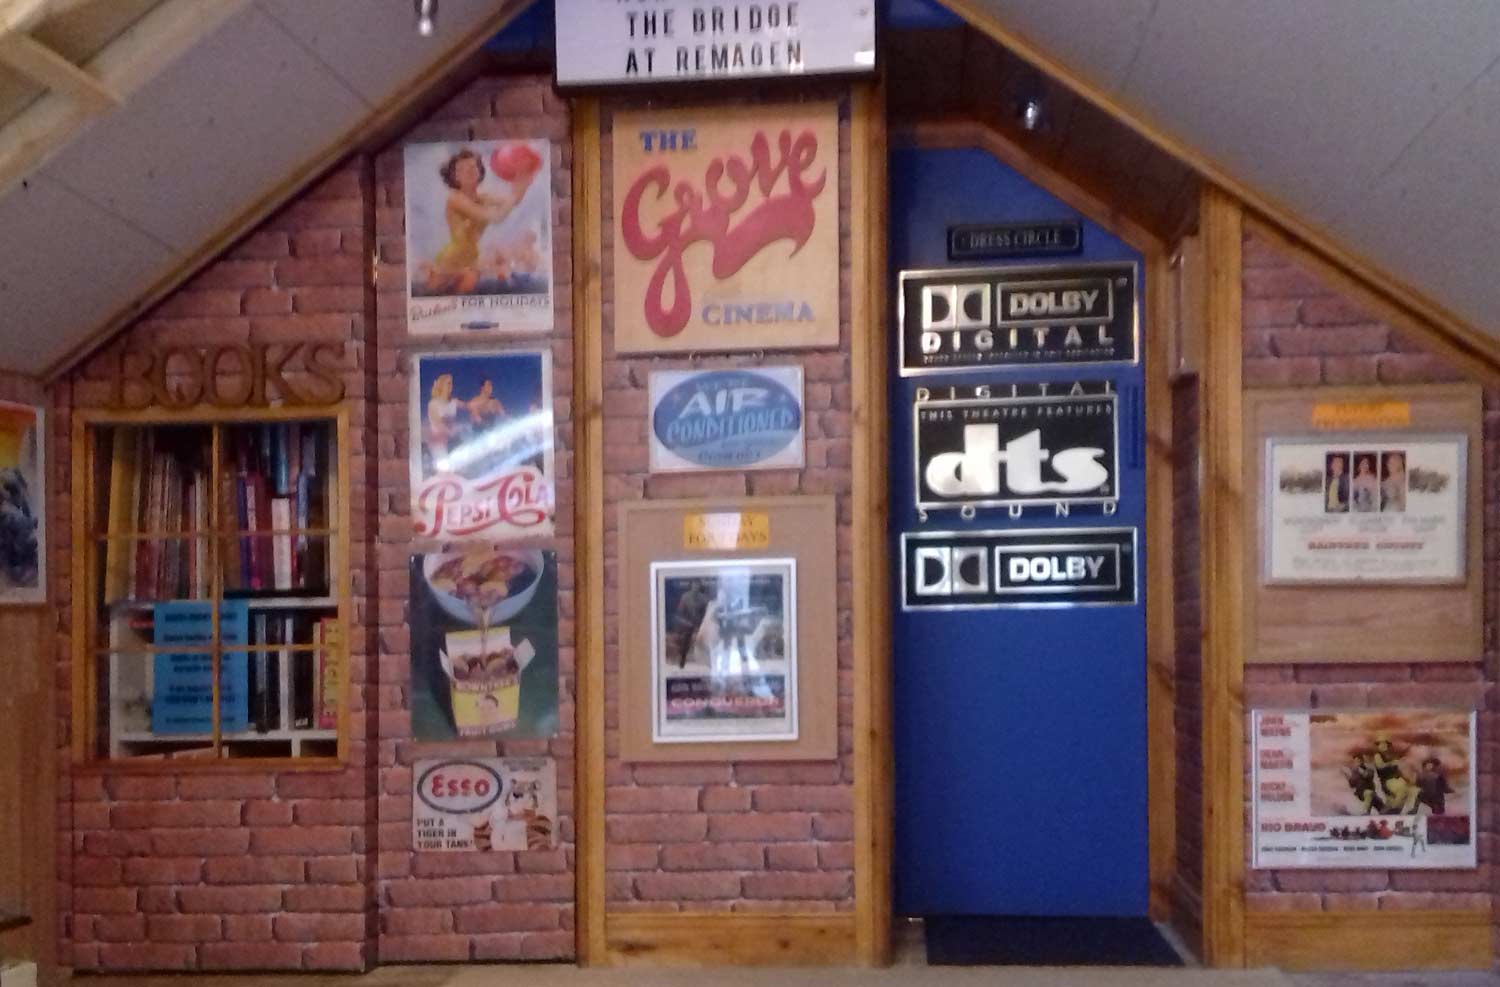
So that accounted for four of the six fans I’d bought. The other two I had in mind to finish another addition to the cinema that I’d temporarily abandoned some time ago, due to similar noise related issues. As the cinema is in a bungalow loft, it’s essentially a windowless room which can get quite stuffy in summer, therefore some ventilation was required. I had initially installed an in-line fan to pull air in from outside and direct it into the cinema through 4" flexible ducts (these are usually used in bathrooms and are designed to remove air and steam. This one was simply turned around so it worked the opposite way) and this was both quiet and worked very well. However, when I finally installed the extractor bit in the auditorium ceiling, which vented through a similar duct into the general loft space, the sound of that one running became intrusive. This was where the two remaining DC fans came in. I removed the 240 volt fan from the ducting, made a box for the two DC fans and installed them in its place, powered by a second DC supply - purchased from eBay once again - and this solved the noise problem immediately. At this point, I finally considered the project finished. However... A bit of remodelling. The thing is, once you’ve gone and built something like this, you become like someone who has built an electric train layout; very soon you can see ways of making it ‘better’. So now, I too am in the grip of a compulsion to tweak and change something that I was previously content with. My first target, if you would care to scroll back through the article, is that odd-looking box that juts out from the facade outside of the auditorium to the right of the entrance. This actually houses the right rear speaker, and although I’d tried to camouflage it so it would somehow blend into the facade, it somehow never quite did – it was always just sort of stuck out there! My solution was to hide it completely – hence the framing out you can see in the picture – still leaving a hole for access to the speaker. This opening is covered by the ‘Sunday For 7 Days’ board, as can be seen in the picture of the finished remodelling a little further down this page.
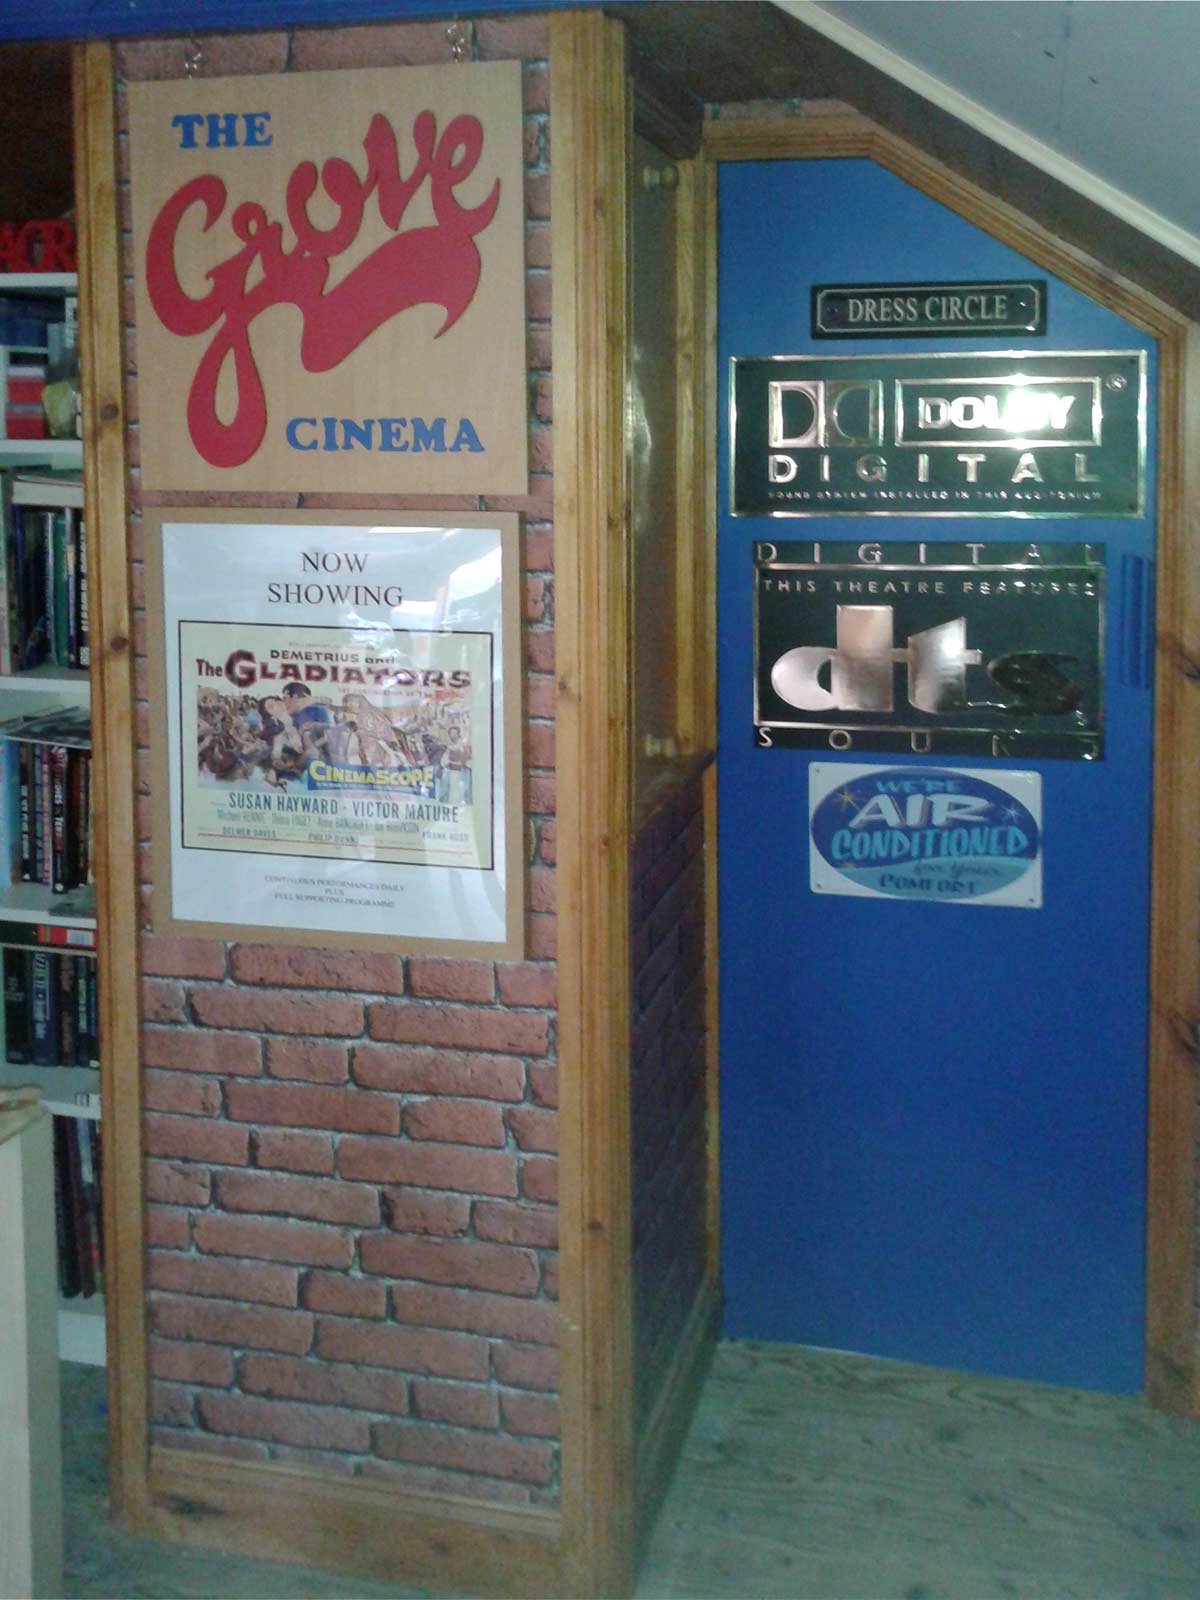
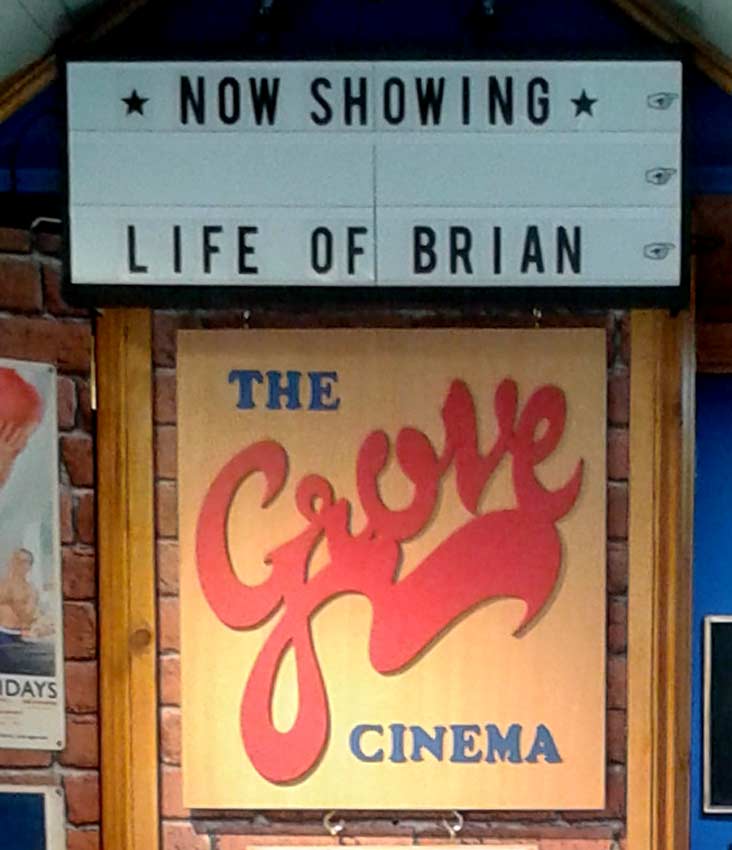
I also wanted to improve the facade by installing a ‘readograph’; that is the illuminated sign over a cinema entrance that displays the title of the film that is currently showing. As I don’t have a great deal of space available, this would have to be the world’s smallest readograph – roughly 2' x 1'. It would also have to have rails or tracks to carry letters – and, of course, be able to be lit up somehow. The answer would be to use a couple of 21cm x 30cm (A4) light boxes that come with letters that can be slid into tracks to spell out Valentine’s or UR 21-type birthday greetings. The pair I bought (from Amazon) cost £18 each and came with nearly 100 letters and a few symbols with each light box. That gave me enough letters (I hoped) to spell out a potentially wide range of film titles. I made a shallow box to contain both light boxes side by side, with holes cut out of each end to access the switches and to allow the USB leads (they are fed from a USB socket) to plug in. I also added a second box, attached to the rear, which would house an LED strip light that illuminate the Grove Cinema sign over which my readograph would hang. I finished it off by painting the whole thing matte black.
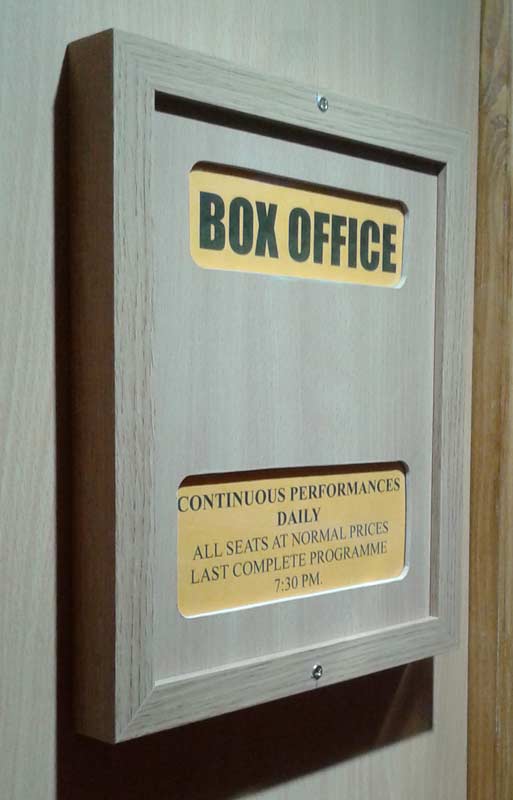
As yet another afterthought, I used some left over MDF sheet to make a hinged panel – seen to the left of the cinema sign - that partially conceals the bookshelves behind it. Covering it with some (left over) brick wallpaper, I added some retro tin signs to give the facade a bit more of a 1950s look. A couple of spare picture frames were adapted to make the signs for ‘Box Office’ and ‘Grove Cinema Cafe’ (our kitchen!).
But I can't seem to stop tinkering with it! In August 2017 I added a bookshop next door to the cinema to hide the bookshelves, which themselves conceal the left rear surround speaker.
Will it all end there? I’m not so sure – I can already feel some more ‘afterthoughts’ stirring. But, it was great fun building it in the first place, and tinkering with it is proving to be just as enjoyable. I’ll keep you informed...
Click on the link above for a gallery of 3D photos of the cinema construction. |
|||||||||||||||||||||||||||
Return to Widescreen Movies Magazine Contents Page
All original material copyright © 2002-2017
John Hayes/Wide Screen Movies Magazine
Last revised: 20 December, 2019